
Thursday, 15 November 2012
Zig Zag Nails
Just posted these on Instagram @yocandy, I used a Nails Inc ( free with this months Glamour Mag) a gold glitter from eBay & Rimmel Black Cab, then a white nail art pen from eBay for the zig zag :)

Friday, 9 November 2012
Caviar Nails
So I bought some caviar nail glitter from eBay, their basically tiny little shiny balls you glue to your nails, I bought some gold ones to test out & loved them so went & bought them in every different colour. They give your nails a much edgier 3d look, they do get caught on things easily( like your hair) but worth it because there beaut !
I did this design really quick to test them out I used Accessorize polish for the base & covered it with a Nails Inc glitter polish I got free in this weeks Glamour Mag.
I then painted a thin line if nail glue over the nail & popped the balls on with an old dried out nail polish brush.
For the heart I just drew a black heart with a nail art pen I bought from eBay for £2.50 & outlined it with more balls.
As usual covered it with clear Polish, so far about 2 have fallen off, but to be honest I thought they all would so I'm pretty pleased :)
I had another go with a darker look, basically a mixture of leopard print & black, I have a tutorial for leopard print on my blog if you want to try them :)


I did this design really quick to test them out I used Accessorize polish for the base & covered it with a Nails Inc glitter polish I got free in this weeks Glamour Mag.
I then painted a thin line if nail glue over the nail & popped the balls on with an old dried out nail polish brush.
For the heart I just drew a black heart with a nail art pen I bought from eBay for £2.50 & outlined it with more balls.
As usual covered it with clear Polish, so far about 2 have fallen off, but to be honest I thought they all would so I'm pretty pleased :)
I had another go with a darker look, basically a mixture of leopard print & black, I have a tutorial for leopard print on my blog if you want to try them :)
Monday, 22 October 2012
Ciate Mini Mani Advent Calendar
Just bought this & I'm so excited for December, anyone who loves nail polish needs to get one if these behind each door is surprise nail polish . Gorgeously packaged with 17 of Ciaté's bestselling mini Paint Pots, four mini Caviar blends, and three exclusive Paint Pot glitter shades you’ll not find anywhere else. I got this online at Selfridges for £38 + £5 p&p, well worth it in my eyes as the whole box costs the same amount as just 4 normal size pots. So watch out for lots of posts about this in December :)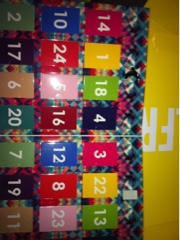


Saturday, 20 October 2012
Splatter Nails
With these I basically got bored & took it out on my nails, I painted them white & literally splatter loads of different colours on top. I used 4 colours on top, got it all over my hands but love the end result, you can make it neater & easier if you put tape around the nail before hand, I just couldn't be bothered :) I didn't try any specific method with this just sort of flicked the brush above my nail & thought it looked pretty good :)
Thursday, 18 October 2012
Ombré/gradient Nail Art
Just a quick run through on how to do gradient or ombré nails.
1. Paint your nails with your first colour, I'm using a turquoise polish I got In a pack from primark.
2. Starting with the tip paint a line of your second colour along the top, try to make it as in even as possible, straight lines with ruin this look, I use a turquoise glitter polish from Beauty Uk.
3. Then with your second colour paint over the tip again, but starting lower than before, repeat again, going lower again try not to go lower than 3/4 of the way down the nail.
4. Finish with a clear polish :)
1. Paint your nails with your first colour, I'm using a turquoise polish I got In a pack from primark.
2. Starting with the tip paint a line of your second colour along the top, try to make it as in even as possible, straight lines with ruin this look, I use a turquoise glitter polish from Beauty Uk.
3. Then with your second colour paint over the tip again, but starting lower than before, repeat again, going lower again try not to go lower than 3/4 of the way down the nail.
4. Finish with a clear polish :)
Wednesday, 3 October 2012
Dogtooth Nail Art
When I first saw this I thought it was impossible as every picture I saw was a nail transfer or stamp, I thought I'd give it a go anyway & it turns out it was quite easy, takes quite a while to do, took me about half an hour all together but well worth it in the end. I only used 3 nail polishes to do this, a white base, black nail art pen & a clear coat I use La Femme polish & a nail art pen from ebay( pics below).
1. So give yourself a couple of coats of the white polish.
2. With the black pen firstly draw a small black square.
3. In the top right & bottom left corners of the square draw a slanted line pointing to the bottom right corner.
4. In the top left corner draw 2 tiny slanted lines, like a slanted V shape coming out of the corner.
5. Repeat the patter over the whole nail & repeat on every nail, finish with a clear coat :)

1. So give yourself a couple of coats of the white polish.
2. With the black pen firstly draw a small black square.
3. In the top right & bottom left corners of the square draw a slanted line pointing to the bottom right corner.
4. In the top left corner draw 2 tiny slanted lines, like a slanted V shape coming out of the corner.
5. Repeat the patter over the whole nail & repeat on every nail, finish with a clear coat :)
Sunday, 30 September 2012
Daisy Print Nails
A really pretty look & you only need 3 colours. I'm using RImmel Lasting Finish in Black Cab, then a gold & a white nail art pen.
1.Paint all your nails in your base colour, mines black. I use false nails most if the time so I don't use a clear base colour( nail protector/hardener ect ) so I just go straight in with the colour If this is going to be done on natural nails I would recommend a clear coat underneath so it doesn't stain the nail.
2.Make a few small dots on each nail, I find 4 is the perfect amount. I'm using a gold nail art pen from eBay.
3.With the final colour draw small semi circles around one of the dots, try & do four to make the flower look complete, then repeat around every dot on every nail.
4.Always finish with a clear coat using La Femme its £1.70 & it's my favourite :) & that's as simple as that Daisy Nails

1.Paint all your nails in your base colour, mines black. I use false nails most if the time so I don't use a clear base colour( nail protector/hardener ect ) so I just go straight in with the colour If this is going to be done on natural nails I would recommend a clear coat underneath so it doesn't stain the nail.
2.Make a few small dots on each nail, I find 4 is the perfect amount. I'm using a gold nail art pen from eBay.
3.With the final colour draw small semi circles around one of the dots, try & do four to make the flower look complete, then repeat around every dot on every nail.
4.Always finish with a clear coat using La Femme its £1.70 & it's my favourite :) & that's as simple as that Daisy Nails
Subscribe to:
Posts (Atom)